

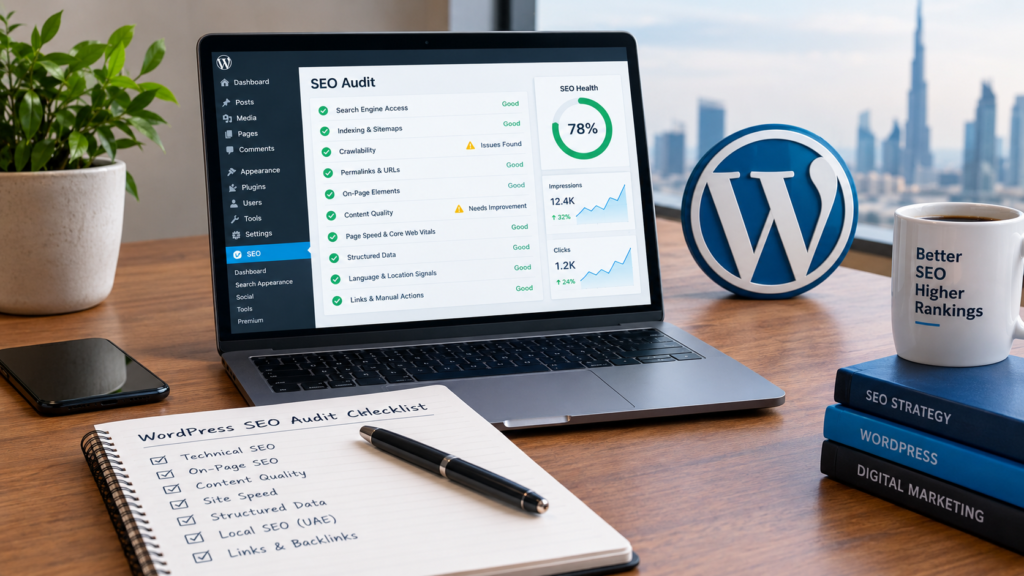
A WordPress site can look finished and still be invisible. The theme is polished, the pages load, the contact form works, and the traffic graph stays flat. Usually the cause is not one dramatic failure but a handful of quiet ones: a setting left over from the staging site, hundreds of thin archive pages in Google’s index, two plugins both outputting the same schema, images that were never compressed.
An SEO audit is how you find those problems in a structured way instead of by guesswork. This checklist runs through ten checks in the order that makes sense for WordPress, from “can Google reach the site at all?” to “is the site sending the right language and location signals?”. That last one matters a great deal for UAE businesses publishing in both English and Arabic. Each step says what to look at, where to find it in WordPress or Google Search Console, and what a problem typically looks like.
Before You Start: Tools and a Baseline
You can complete this audit with free tools. Set these up first, because several steps depend on them.
| Tool | What you’ll use it for |
|---|---|
| Google Search Console | Indexing status, sitemaps, manual actions, Core Web Vitals and search performance |
| Screaming Frog SEO Spider (free version crawls up to 500 URLs) | Crawling the site for status codes, titles, headings and canonicals |
| PageSpeed Insights | Lab and real-user speed data for individual URLs |
| Your SEO plugin (Yoast SEO, Rank Math, All in One SEO or SEOPress) | Title and meta templates, sitemaps, schema and robots settings |
| Google Analytics or your analytics tool | Which pages bring organic visits and conversions |
Before changing anything, record a baseline: organic clicks and impressions from Search Console for the last three months, the number of indexed pages, and your ten most important pages. Take a full backup too. Several fixes below, such as permalinks, redirects and noindex rules, are easy to get wrong, and a backup turns a mistake into a ten-minute restore.
Step 1: Check That Search Engines Can Reach the Site
Start with access. Nothing else in this checklist matters if pages are blocked.
- The Reading setting. In WordPress, go to Settings → Reading and make sure “Discourage search engines from indexing this site” is unticked. It is often ticked while a site is being built and forgotten at launch.
- robots.txt. Open yoursite.com/robots.txt. A line reading Disallow: / under User-agent: * asks crawlers to stay away from the whole site. Also check that your CSS, JavaScript and image folders aren’t blocked, because Google needs them to render pages.
- Noindex tags. Run your homepage and a few key pages through the URL Inspection tool in Search Console. If a page is reported as excluded by a “noindex” tag, find the source: a page-level setting in your SEO plugin, a theme option, or leftover code.
- HTTPS and a single preferred version. The site should load over HTTPS, and the http, www and non-www variants should all redirect with a 301 to one version. The WordPress Address and Site Address under Settings → General should match it. Look for mixed-content warnings too, where an HTTPS page still loads images or scripts over HTTP.
Fix anything you find here before moving on. A single ticked box can undo months of work.
Step 2: Compare What Google Has Indexed With What Should Be Indexed
In Search Console, open Indexing → Pages. You’ll see how many URLs are indexed and, more usefully, why others aren’t. The goal is not to get every URL indexed. It is to make sure the right ones are. Read the “Why pages aren’t indexed” list with these meanings in mind:
- “Crawled – currently not indexed” or “Discovered – currently not indexed” on pages you care about usually points to thin content, weak internal links, or a site Google doesn’t yet crawl deeply.
- “Duplicate without user-selected canonical” and “Alternate page with proper canonical tag” often mean WordPress is producing several URLs for the same content.
- “Excluded by ‘noindex’ tag” is fine for pages you meant to hide, such as thank-you pages, and a problem for anything else.
- “Not found (404)” and “Page with redirect” show which old URLs are still being requested.
Next, open Indexing → Sitemaps and submit your sitemap if you haven’t already. Yoast SEO and Rank Math typically publish one at /sitemap_index.xml, while WordPress itself creates /wp-sitemap.xml. If both are live, switch one off. The sitemap should list only canonical, indexable pages, with no redirected, noindexed or 404 URLs in it.
WordPress also has a habit of generating pages nobody planned. Scan the indexed URLs for tag archives containing a single post, author archives on a one-author site, attachment pages for individual images, internal search results and date archives. As an illustration, a 40-page service website can easily have several hundred of these thin URLs indexed alongside its real pages. Most SEO plugins let you noindex or redirect each type, so decide for each one whether it gives a visitor anything useful.
Step 3: Crawl the Site the Way a Search Engine Does
A crawl shows the whole site as a sortable list, which no amount of clicking around can match. Run Screaming Frog, or the free site audit in Ahrefs Webmaster Tools, across the full site and work through these checks. The technical SEO mistakes that most often surface are covered in more detail on our blog.
- Response codes. Look at 4xx errors (broken pages and broken links) and 5xx errors (server problems). Fix internal links that point to 404s, and redirect deleted pages to the closest relevant replacement rather than the homepage.
- Redirect chains and loops. A to B to C should be A to C. Chains build up after redesigns, HTTPS moves and permalink changes.
- Canonical tags. Each page should normally point to itself. A page canonicalised to a different URL by mistake can quietly drop out of results.
- Duplicate or missing titles, meta descriptions and H1s. Step 5 covers these, but the crawl is the fastest way to find them.
- Orphan pages. Pages that appear in your sitemap or analytics but receive no internal links are hard for crawlers and readers to find. Link to them from relevant pages.
- Crawl depth. Your most important pages should sit within a few clicks of the homepage.
If the crawl turns up a long list of site-wide problems, our technical SEO page explains how these issues are usually grouped and fixed.
Step 4: Review Permalinks and URL Structure
Under Settings → Permalinks, the “Post name” option gives clean URLs such as /wordpress-seo-checklist/ instead of ?p=123. Beyond that setting, look for:
- URLs that are long, padded with stop words or carry dates you don’t need.
- Category bases or date folders that add depth without adding meaning.
- Inconsistent trailing slashes, where both versions of a URL load without a redirect.
- Parameters such as ?utm_ tags, ?replytocom= or ?s= producing indexable duplicates.
Don’t change the URL of a page that already ranks just to tidy it. If you must, set up a 301 redirect from the old address to the new one, update your internal links and watch Search Console for a few weeks. Changing the permalink structure of a live site is one of the riskier edits in this checklist, so take that backup first.
Step 5: Audit the On-Page Elements
Most audit guides start here, but this step only pays off once Steps 1 to 4 are clean. For every important page, check the following:
| Element | What to check | Typical WordPress problem |
|---|---|---|
| Title tag | Unique, describes the page, main topic near the front, roughly 60 characters or fewer | A plugin template adds the same long suffix to every title, or titles are left on defaults |
| Meta description | Written for a person, matches the page, around 155 characters | Empty, or auto-filled from the first paragraph |
| H1 | One per page, matching the page’s purpose | The theme prints the site name as the H1, or a page builder adds a second one |
| H2 and H3 headings | Logical order, used for structure rather than styling | Heading tags used to make text bigger |
| Images | Descriptive file names and alt text, compressed, sized correctly | Full-size camera photos, empty alt text, file names like IMG_4021.jpg |
| Internal links | Descriptive anchor text pointing to related pages | “Click here” anchors, and no links from blog posts to service pages |
Titles and descriptions aren’t ranking guarantees, and Google sometimes rewrites them. They are still your main chance to win the click. To find the best starting point, sort pages in Search Console by impressions and look for those with plenty of impressions but a low click-through rate. Those titles are the first to rewrite. For a closer look at this layer, see our on-page SEO page.
Step 6: Audit Content Quality Page by Page
Export the URL list from your crawl, add clicks and impressions from Search Console and sessions from analytics, then give every page one of four decisions:
| Decision | When to use it |
|---|---|
| Keep | The page ranks or converts, and the information is accurate |
| Update | The page has impressions but is slipping, or its details (tools, rules, processes) are out of date |
| Merge | Two or more pages target the same query and compete. Combine them into the stronger URL and 301 the others |
| Remove | The page is thin or outdated, with no traffic, links or purpose. Redirect it if a close replacement exists |
Look specifically for keyword cannibalisation. In the Search Console performance report, filter by a query and open the Pages tab. If several of your pages share impressions for the same query, they are probably competing with each other.
Then ask of each important page what a searcher would ask: does it answer what they came for, and does it add something the pages already ranking don’t, such as a worked example, local detail or original data? Pages that only restate what is already out there are the ones most likely to sit in “Crawled – currently not indexed”.
Step 7: Test Speed and Core Web Vitals
Run your key templates through PageSpeed Insights: the homepage, a service page and a blog post. Give the field data at the top, which comes from real Chrome users, more weight than the lab score. Core Web Vitals measure three things: Largest Contentful Paint for loading (2.5 seconds or less is rated good), Interaction to Next Paint for responsiveness (200 milliseconds or less) and Cumulative Layout Shift for visual stability (0.1 or less). The Core Web Vitals report in Search Console groups failing URLs, so you can fix by template rather than page by page.
On WordPress, slow pages usually trace back to a short list of causes:
- Images. Oversized files, no modern format such as WebP, and the main above-the-fold image set to lazy-load, which delays the largest element on screen.
- Plugins. Too many of them, or plugins that load scripts and styles on every page although they are used on one. Deactivate and compare before you delete.
- Theme and page builder. Heavy themes and builder output add markup and scripts. Check how much unused CSS and JavaScript is being loaded.
- Caching. A page cache and browser caching should both be switched on.
- Fonts. Many font files, or fonts that hold back text until they load.
- Hosting. An old PHP version or slow server response. For visitors in the UAE, check where your server is located and whether a CDN serves pages from a nearby location.
Test on a real phone as well as in a browser emulator. Google predominantly uses the mobile version of a page for indexing, so a layout that breaks on a small screen is an SEO problem as well as a usability one.
Step 8: Review Your SEO Plugin, Theme and Structured Data
Open your SEO plugin’s settings and compare them with what you’ve found so far: title and meta templates, which post types and taxonomies are indexable, what the sitemap contains, and the canonical, breadcrumb and redirect settings. Running two SEO plugins at once is a classic mistake that duplicates meta tags and sitemaps, so confirm only one is active.
Then test key pages with Google’s Rich Results Test and the Schema Markup Validator. A typical setup has Organization or LocalBusiness markup on the homepage, Article markup on blog posts and BreadcrumbList across the site. Watch for duplicate schema when both the theme and the plugin output it, for markup describing things that aren’t visible on the page, such as review ratings, and for errors or warnings. Schema helps search engines understand a page. It doesn’t promise rich results.
Step 9: Check Language and Location Signals (UAE Sites)
If your site serves the UAE market, this is where a generic checklist stops short.
- English and Arabic versions. Each page should link to its counterpart with hreflang annotations, and each version should reference itself as well. Translation plugins such as WPML, Polylang and TranslatePress can output these, but check the actual page source rather than trusting the setting. Arabic pages should display right-to-left, carry translated titles and meta descriptions, and have their own crawlable URLs instead of being swapped in with JavaScript on the same address.
- Language declarations. The lang attribute in the page’s HTML should match the language of the content.
- Business details. Your name, address and phone number should be identical on the website, your Google Business Profile and any directory listings. Check opening hours and the map link too.
- Location pages. If you serve several emirates, make sure each location page has distinct, useful content rather than one template with the city name swapped.
- Local formats. Prices in AED, metric units and UAE phone numbers should be written consistently across the site.
Local visibility has its own checks beyond these. Our local SEO page covers them.
Step 10: Check Links, Manual Actions and AI Crawler Access
- Manual actions and security issues. In Search Console, open Security & Manual Actions and confirm both are clear.
- Backlinks. Use Ahrefs Webmaster Tools, which is free for sites you’ve verified, or a similar tool. See who links to you, whether your most-linked pages still return a 200 status, and whether any links point to deleted URLs. Redirect those to a relevant live page. Most sites don’t need Google’s disavow tool, so leave it unless you have a manual action or clear evidence of a link scheme.
- AI search crawlers. Review your robots.txt file and any security or firewall plugin to be sure you aren’t blocking crawlers by accident, and decide deliberately which ones you want to allow. Clear, well-structured pages that load their content in the HTML are easier for any system to read, but nothing here guarantees a mention in AI-generated answers.
Turn Your Findings Into a Prioritised Fix List
An audit that produces a 90-item spreadsheet usually gets filed and forgotten. Sort findings by two questions: how many pages does the issue affect, and how hard is it to fix? For most WordPress sites, this order works well:
- Anything blocking crawling or indexing, such as the Step 1 issues and stray noindex tags. Do these immediately.
- Site-wide problems you can fix once: redirect chains, duplicate sitemaps, template-level title and H1 problems, and index bloat from archives.
- Page-level fixes on pages already earning impressions: titles, descriptions, content updates and internal links.
- Speed and Core Web Vitals fixes, by template.
- Longer-term work: merging or pruning content, filling content gaps and building links.
Log each fix with its date so you can compare results against your baseline. Search Console data lags, so allow several weeks before judging whether a change worked.
How Often Should You Audit a WordPress Site?
A sensible rhythm for most sites is a short monthly check and a fuller quarterly review. Each month, spend twenty minutes in Search Console looking for new indexing errors, manual actions and Core Web Vitals failures. Each quarter, repeat the crawl and the content review. Run the technical steps straight away after any big change, such as a redesign, migration, theme switch, new language version or major plugin update. Checking the title, headings, images and links on each new post before you publish is far cheaper than fixing them later.
WordPress SEO Audit Checklist at a Glance
- “Discourage search engines” is off, and robots.txt isn’t blocking the site
- No accidental noindex tags on pages that should rank
- One HTTPS version of the site, with all other versions redirecting
- Search Console indexing reviewed, and the sitemap submitted and clean
- Thin archives, attachment pages and parameter URLs controlled
- Full crawl run: 4xx and 5xx errors, redirect chains, canonicals and orphan pages fixed
- Permalinks clean, with 301 redirects for any URL that changed
- Titles, meta descriptions, H1s, headings, images and internal links reviewed
- Every important page marked keep, update, merge or remove
- Core Web Vitals checked and fixed by template
- One SEO plugin active, and structured data validated
- Hreflang, RTL display, business details and location pages checked (UAE sites)
- Manual actions, backlinks and crawler access reviewed
- Fixes prioritised, dated and measured against the baseline
Frequently Asked Questions
Can I audit a WordPress site using free tools only?
Yes. Search Console, PageSpeed Insights, the free version of Screaming Frog and your SEO plugin cover most of this checklist. Paid tools mainly add scale, historical data and competitor comparisons.
Will my SEO plugin’s score audit the site for me?
Not fully. Plugin scores check on-page basics one page at a time, such as whether the focus keyword appears in the title. They can’t see indexing problems, crawl errors, speed issues or hosting limits, so treat the score as one input rather than the audit itself.
How long does a WordPress SEO audit take?
It depends on the size and complexity of the site. A small brochure site can be covered in an afternoon. Larger, multilingual or e-commerce sites take longer, mostly because of the crawl review and the page-by-page content decisions.
Need a Second Pair of Eyes on Your WordPress Site?
If you’d rather have the audit done and the fixes handled for you, Solowiz offers SEO audit and WordPress SEO services for businesses in Dubai and across the UAE. Get in touch to talk through what your site needs.